Backup Outlook 2007
Microsoft Outlook is constantly undergoing changes, and with every new version, Microsoft tries its best, to bring in new and innovative features on Outlook. When MS Outlook 2007 was released, it offered many features that weren't available in the earlier versions of the Outlook. Microsoft Outlook 2007 comes bundled along with the Microsoft Office 2007 Sui te.
Some of the key and important features of Outlook 2007 can be summarized as follows-
- Better managing daily activities
- Faster and better search options
- Sharing information made easy
- Safety and Security of data
Despite MS Outlook 2007 offers so many advanced features, there are instances when Outlook data could get deleted or lost. Therefore, the creation of your MS Outlook 2007 serves much beneficial in the situations of email data loss disasters. Certain unfavorable situations that lead to loss or deletion of MS Outlook 2007 email files include-
- Mistaken deletion of PST files
- Outlook upgrade to a higher version (without creating a backup)
- The interrupted Outlook synchronization process
- Impact of the virus and other malware threats on MS Outlook 2007 inbox
There could be even other instances whereby MS Outlook emails and its attributes like contacts, settings, notes, calendar, journal, etc. go missing or deleted. To avoid loss of valuable data when Outlook gets corrupted, it is important that you make use of a good Outlook backup software. Well, backing up MS Outlook 2007 emails is no longer a difficult thing when you have Migrate Outlook software.
Migrate Outlook utility to backup MS Outlook 2007 mailbox
Migrate Outlook software lets you backup all your Outlook 2007 data in a single click. The software lets the user compress and password protect his backup file to save the disk space and keep the backup data safe and secure. This advanced backup and migrate tool is loaded with distinct features that let you schedule your email backup on a daily, weekly, or monthly basis. Moreover, this program is fully compatible with all editions of MS Outlook - Outlook 2000, 2003, 2010, 2013, and 2016. Check out how to migrate Outlook 2003 settings to 2010 in quick steps using this utility. You can install this app on any edition of your Windows OS.
Simple steps to backup Outlook 2007
Step 1: Open the Migrate Outlook software on your system. Click on the Backup button.

Figure a: Main window
Step 2: Choose whether Smart Backup or Advance Backup, refer Figure b.
Step 3: In the Create/Manage Profile window, as shown in Figure b. You can either select a previously existing profile, by selecting the Use an existing backup profile option or select the Create a new backup profile option.

Figure b: Select Backup Option
Step 4: When the Outlook 2007 backup operation you can click on the View report option to check the backup summary.
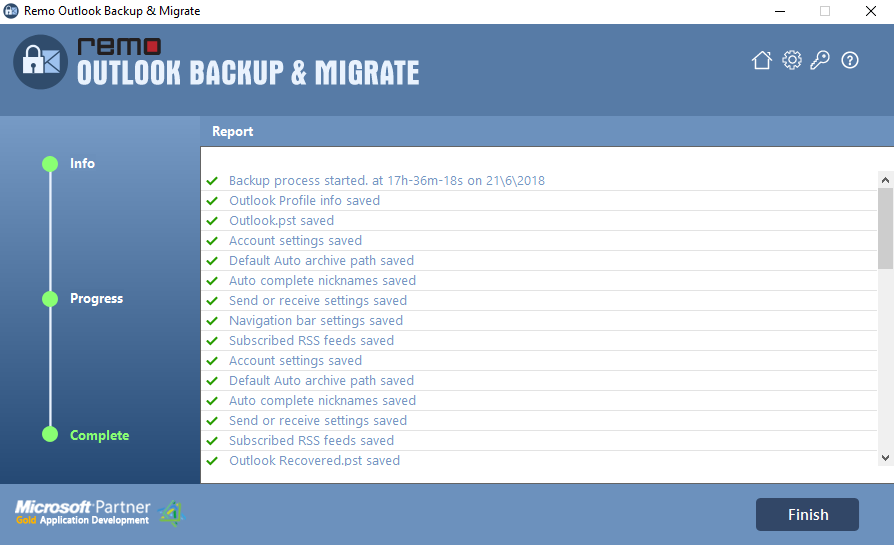
Figure c: Outlook Backup Report