Outlook Backup & Migration: Safeguard your Data and Transfer With Ease
Backup of documents or valuable photos is not only in the case of importance but also in case of important emails that are present in Microsoft Outlook. It is, therefore, a good practice to create and maintain an updated backup of your Outlook data at regular intervals so that in case if Outlook crashes, an updated backup will serve to be a savior. Keeping this in mind, Microsoft has included an Import/Export option in Microsoft Outlook which lets the user Import and Export Outlook data, to and from the Microsoft Outlook.
The steps involved in taking a backup of the Outlook data using the Export option can be summarized as follows-
- Open Outlook, click on File and then click on Import and Export
- Select the Export to a File option from the Choose an action to perform list that gets displayed
- Select Personal Folder (pst) option from the Create a file of type list and then click Next
- Select the folder that you would like to export from the Select the folder to export from list. The folder might be your Inbox or Drafts folder. Now, click on the Next to proceed to the next step
- Select the destination location where you would like to save your file and then click on Finish
Fully Automated Outlook Backup & Migrate: Use Outlook Migration Software:
Though this process seems to be simple enough for taking a backup of one Outlook item, the process becomes tedious and time consuming when a backup of all the Outlook data has to be performed. There are many instances where users experienced issues or conflicts with the MS Outlook Export/Import task. Nonetheless, you can avoid any troubles that arise while transferring or backing up Outlook data by utilizing the powerful Migrate Outlook software. The Outlook Migration software is a smart backup tool customized for Microsoft Outlook users. This software lets the user create a backup of all Outlook items with ease. Using this toolkit, you can migrate Outlook tasks, emails, notes, calendar, etc. to any upgraded version of Outlook using the backup created by this software.
Steps to backup Outlook data using Migrate Outlook tool
Step 1: Launch Migrate Outlook software on your computer.

Figure a: Main window
Step 2: Click on the Smart Backup button provided on the home screen. The software displays the estimated backup file size, and the path of the destination drive, into for saving the backup data, as shown in Figure b. One can also choose to go with Advance Backup option.
Figure b: Backup Options
Step 3: Once the Smart Backup process is complete, you can view the backup summary as shown in figure c.
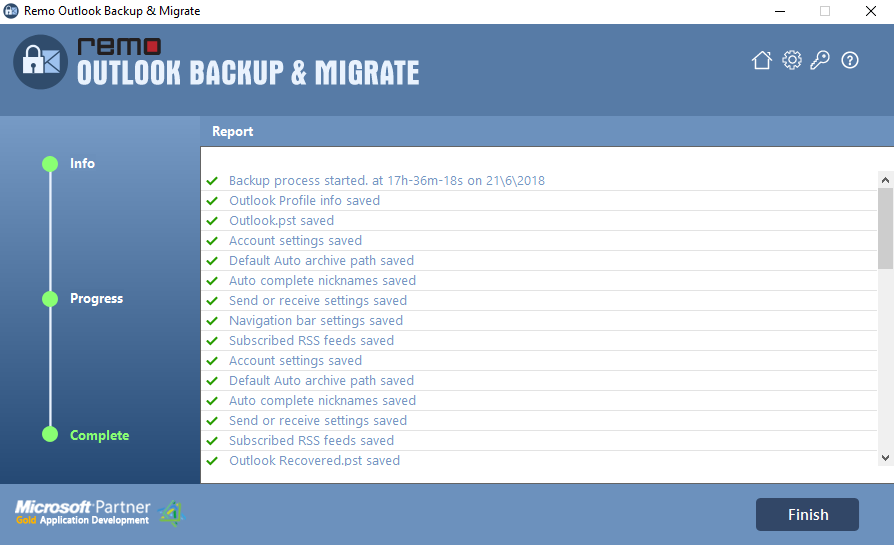
Figure c: Backup Summary