Migrate Outlook Emails to A New Computer: Preserve Your Inbox During the Transition
Moving to a new computer doesn't mean leaving your precious Outlook emails behind. Whether you're upgrading or switching machines, migrating your Outlook emails to a new computer is crucial to maintain productivity and access to important messages. In this comprehensive guide, we'll walk you through the step-by-step process of migrating Outlook emails to your new computer, ensuring a seamless transition and the preservation of your valuable email data.
Many of the users struggle when it comes to the safe migration of Outlook emails to a new computer. Though Outlook provides outstanding features for managing email accounts, many users face difficulty to perform tasks like import, export, backup, and migrating Outlook data manually. Here are certain instances that obligate transfer of Outlook emails to another system-
- System encounters frequent freezes or crashes, boot failures, aged hard drive, etc. and you need to replace the system with a new one
- The hard drive is infected by dreadful viruses or malware
- When you upgrade Microsoft Outlook version to its higher version
The manual transfer operation of Outlook emails to a new PC is a time consuming and tedious job. Often users commit minute mistakes while moving emails and end up in serious file loss disasters. Well, you can effortlessly transfer MS Outlook emails by utilizing the Outlook migration program.
Transfer Outlook Emails to New Computer Using This Outlook Migration Software
Migrate Outlook is a highly-effective tool for transferring Outlook from one system to another without any hassle. It is designed with a friendly UI that guides in every step of backup and migrate process. This application is fully compatible with all editions of Microsoft Outlook (from Outlook 2000 to Outlook 365, & Outlook 2019). Also, the program lets the users to easily backup and migrate complete PST file between any laptops/desktops running on any edition of the Windows operating system.
Step-by-step instructions to migrate Outlook emails to new computer:
Step 1: Download and install the Migrate Outlook tool on the new Windows PC where you wish to move your Outlook PST emails. Then on the main screen as shown in fig. I. Click on the Migrate icon.

Fig I: Welcome Window
Step 2: Select a backup file from which emails have to be migrated and then press on the Next button.
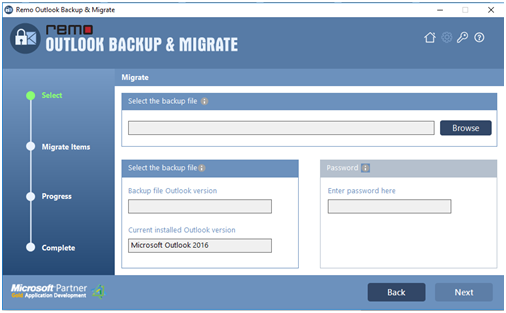
Fig II: Select Backup file to Migrate Contacts
Step 3: Now, pick the items to migrate from the list displayed and click on the Next button as shown in Fig III.

Fig III: Select Contacts to Migrate
Step 4: After clicking on next, the migration process gets started and later the summary of this migration will be displayed as shown in Fig IV.

Figure IV: Details of the Migration Process